
Create a Newsletter Subscription Form with Next.js API Routes and the Twitter Revue API


Collecting emails and shepherding a trusting newsletter list is one of the best ways to nurture a community and grow your personal brand.
In this article, I’ll show you how easy it is to create a newsletter sign-up form with Next.js API routes, React hooks and the Revue API.
What is Revue?
Revue is a newsletter platform that allows writers to easily send both free and paid newsletter issues.
Revue was originally a service created by a Dutch startup, but was acquired by Twitter in January of 2021.
More recently, Twitter announced that creators can embed their Revue newsletter into their profile page, allowing visitors to easily discover and subscribe and driving more web developers to choose Revue as their newsletter service of choice.
Haven’t created a Revue account yet? Create your newsletter here!
The Revue Newsletter API
One of the benefits of using Revue as a newsletter service is the easy-to-use API.
In order to make API calls with Revue, head to the Integrations tab under your profile, collect the API key at the bottom of the page, and store it in an environment variable in your Next.js project.
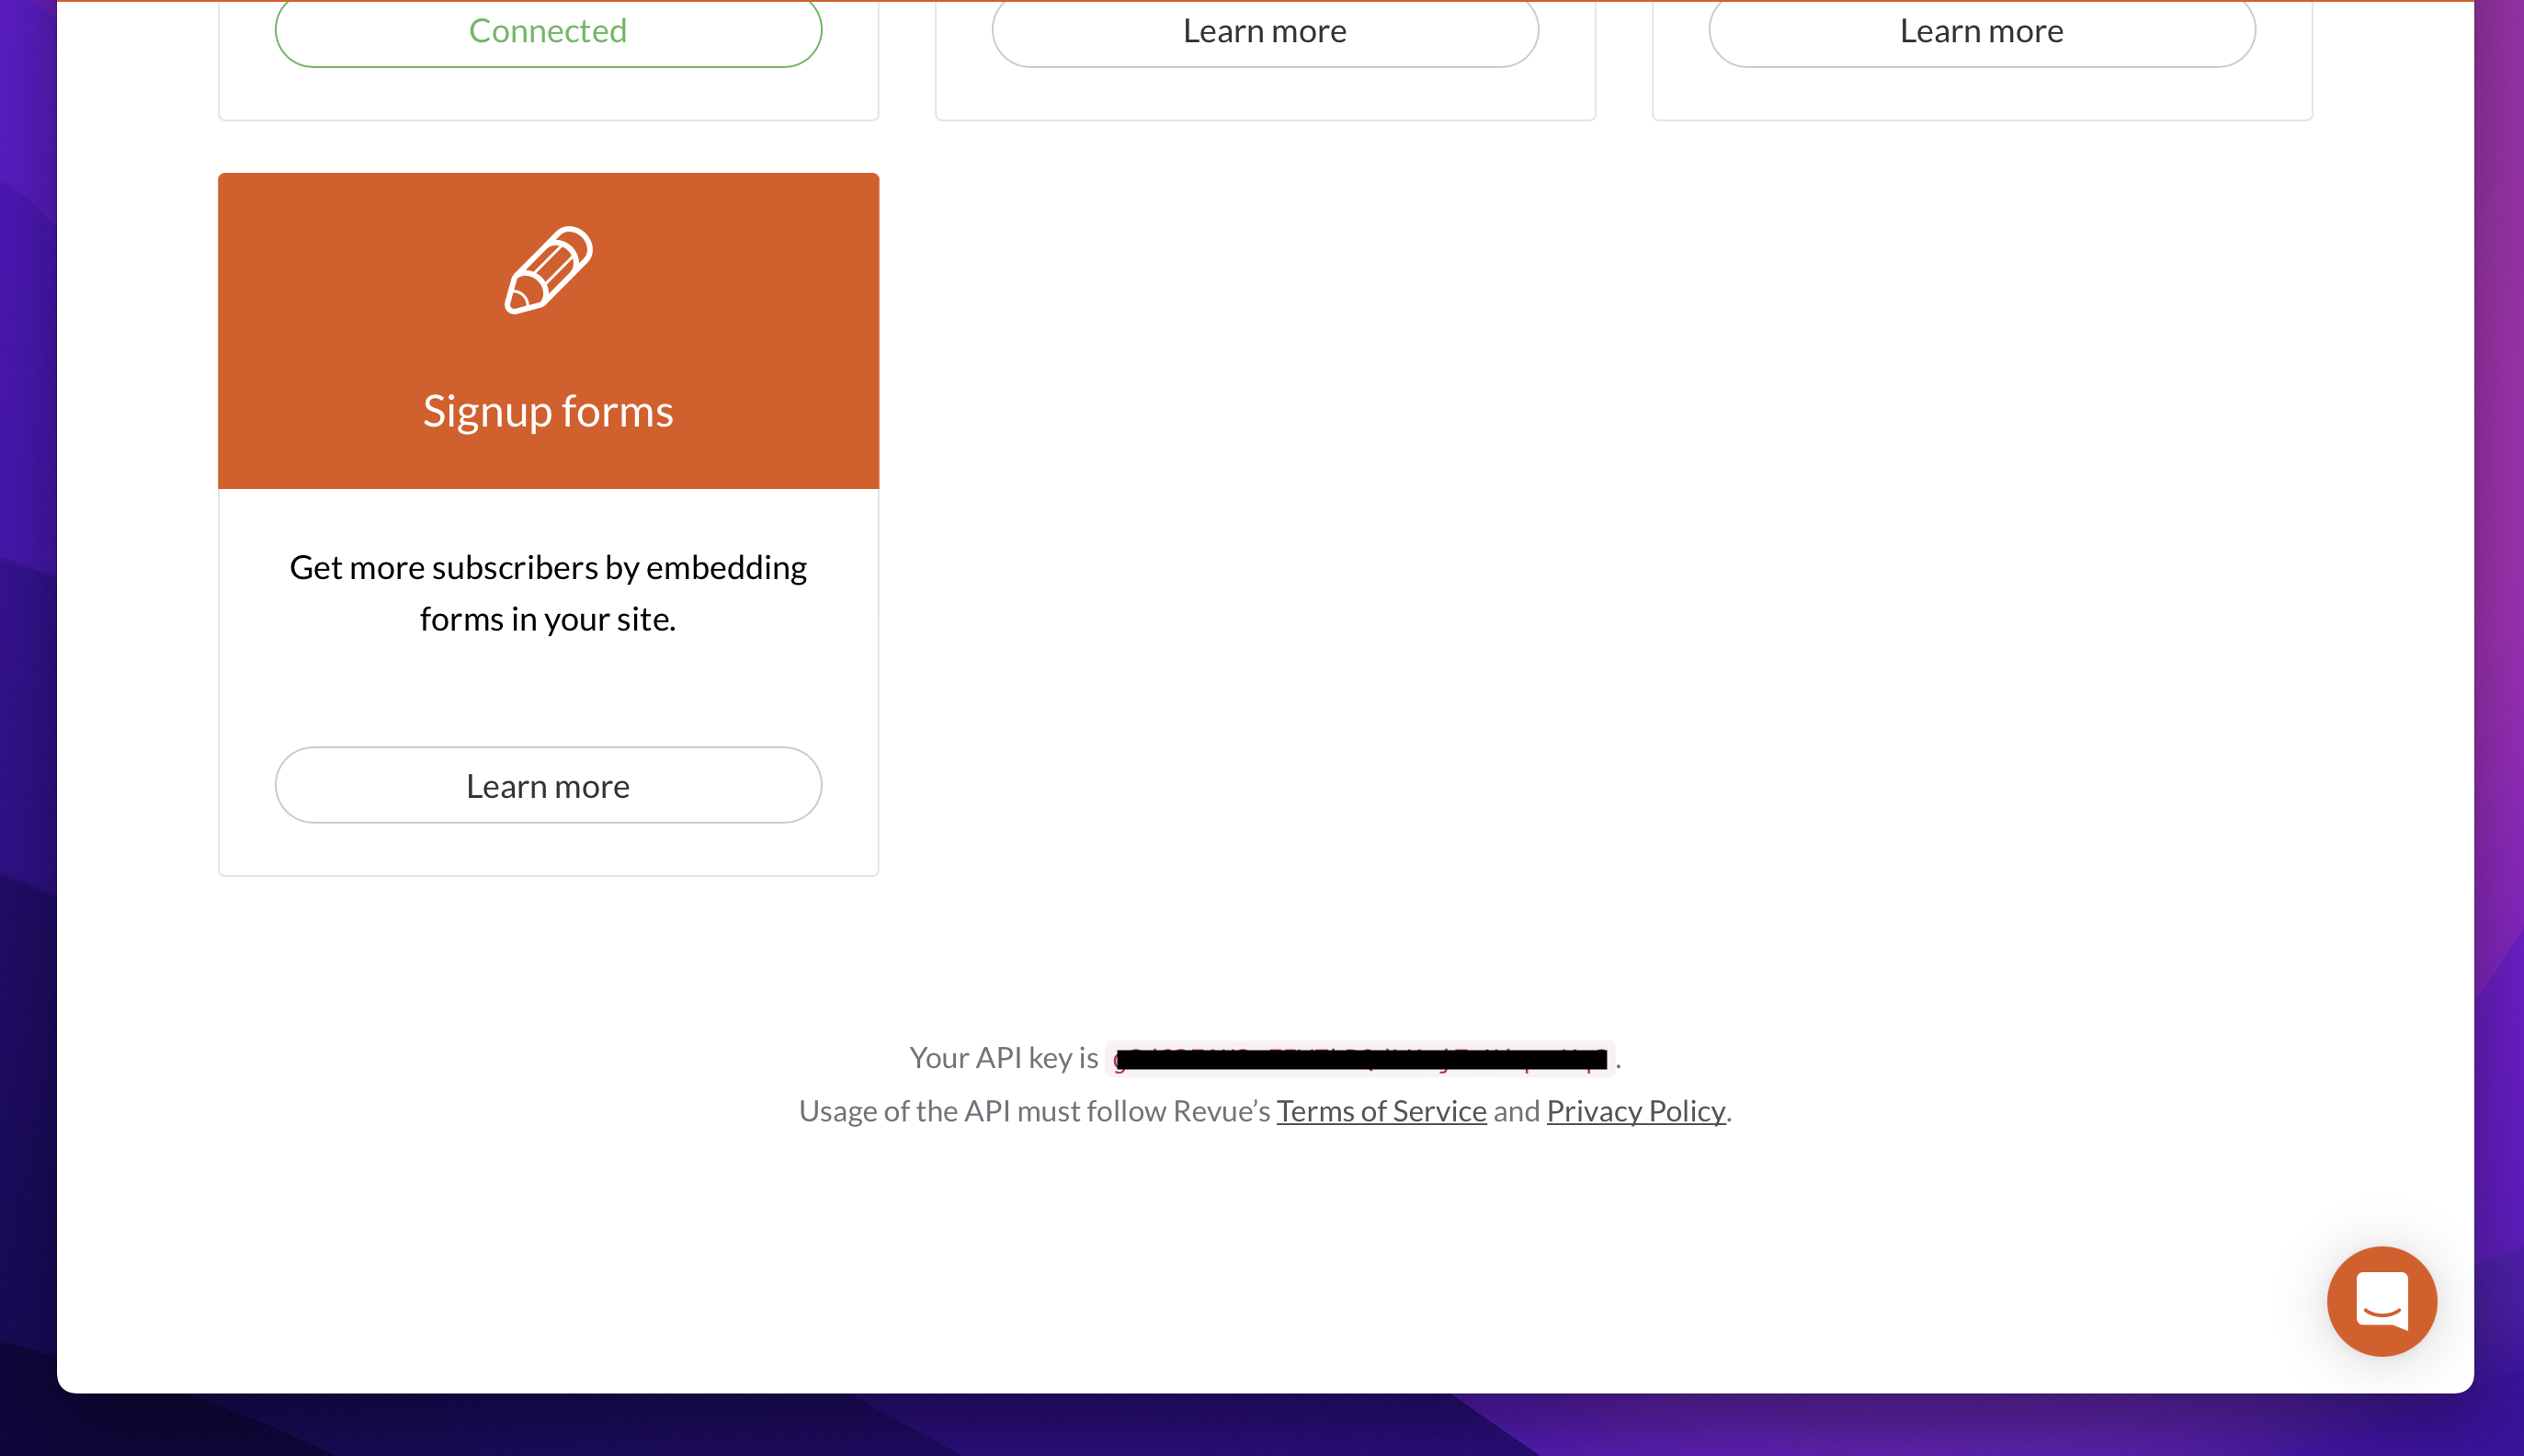
Take your API key and store it in an environment variable
⚠️ NOTE: Revue just recently changed how their API works. Before you can start to consume the API, you have to verify your account. Contact Revue support for more instructions.
Create the Subscribe Next.js API Route
In order to subscribe someone to your newsletter, a function must be created that passes the user’s email to the Twitter Revue API.
While you could use the Revue API directly in a component, creating an abstraction and using a Next.js API Route allows for greater flexibility and separation of concerns. Plus, if you decide to move away from the Revue newsletter service down the line, the only code you’ll need to update is in the API Route - the function interacting with the Revue API.
If you’re unfamiliar, an API Route in Next.js is a serverless function that provides a solution to build your own API endpoints.
Under the pages/api directory in your Next.js project, create a new file called subscribe.ts and export a default handler function.
import type { NextApiRequest, NextApiResponse } from 'next';

export default function handler(req: NextApiRequest, res: NextApiResponse) {

}
📣 I’m using TypeScript for this tutorial, but the logic remains mostly the same if your project is in JavaScript.
Next, assume that this function is passed an email from the req object. Destructure the email address from the req object and make a check to see if the email exists.
export default function handler(req: NextApiRequest, res: NextApiResponse) {
    const { email } = req.body;

    if (!email) {
      return res.status(400).json({ error: 'Email is required' });
    }

}
If the email is passed to the function, make an API request to the Revue newsletter API and pass the email address along with the API token as part of the Authorization header.
export default function handler(req: NextApiRequest, res: NextApiResponse) {
    const { email } = req.body;

    if (!email) {
      return res.status(400).json({ error: 'Email is required' });
    }

  const result = await fetch('https://www.getrevue.co/api/v2/subscribers', {
    method: 'POST',
    headers: {
      Authorization: `Token ${process.env.REVUE_API_KEY}`,
      'Content-Type': 'application/json'
    },
    body: JSON.stringify({ email, double_opt_in: false })
  });

}
📣 I’ve passed an additional property to the request called
double_opt_inand set it tofalse, informing Revue to add the subscriber to the list without having to confirm their email.
Finally, parse the result and check to make sure there aren’t any errors before returning the status of 201 to the caller. The function in final form should look like this:
import type { NextApiRequest, NextApiResponse } from 'next';

export default function handler(req: NextApiRequest, res: NextApiResponse) {
    const { email } = req.body;

    if (!email) {
      return res.status(400).json({ error: 'Email is required' });
    }

  const result = await fetch('https://www.getrevue.co/api/v2/subscribers', {
    method: 'POST',
    headers: {
      Authorization: `Token ${process.env.REVUE_API_KEY}`,
      'Content-Type': 'application/json'
    },
    body: JSON.stringify({ email, double_opt_in: false })
  });

    const data = await result.json();

  if (!result.ok) {
    return res.status(500).json({ error: data.error.email[0] });
  }

  return res.status(201).json({ error: '' });

}
Create the Form Types with Typescript
We can leverage TypeScript to apply a state or mode to the subscription form.
Create a new enum called Form and add the following states:
export enum Form {
  Initial,
  Loading,
  Success,
  Error
}
Next, create a new type for the form and utilize the enum that was just created:
export type FormState = {
  state: Form;
};
Create a React Hook to Subscribers Users
With the API Route ready-to-go, create a hook called useSubscribeToNewsletter.ts in your project. While we could put the form subscription logic in the component itself, creating an abstraction allows for reusability throughout your project and simplifies the component itself.
First, create a slice of state to hold the value of the subscription form and then create a reference to the form. The form can be in one of four modes: Initial, Loading, Success, and Error.
import { useRef, useState } from 'react';

export function useSubscribeToNewsletter() {
    const [form, setForm] = useState<FormState>({ state: Form.Initial });
    const inputEl = useRef(null);

}
Next, create a subscribe function inside the hook and call the API Route that was created just a few moments ago.
async function subscribe(e) {
  e.preventDefault();
  setForm({ state: Form.Loading });

  const res = await fetch(`/api/subscribe`, {
    body: JSON.stringify({
      email: inputEl.current.value
    }),
    headers: {
      'Content-Type': 'application/json'
    },
    method: 'POST'
    });

}
After the request has been completed, check to see if there’s an error, otherwise set the value of form to Form.Success and clear out the content in the form.
async function subscribe(e) {
  e.preventDefault();
  setForm({ state: Form.Loading });

  const res = await fetch(`/api/subscribe`, {
    body: JSON.stringify({
      email: inputEl.current.value
    }),
    headers: {
      'Content-Type': 'application/json'
    },
    method: 'POST'
    });

    const { error } = await res.json();

    if (error) {
      setForm({
        state: Form.Error,
        message: error
      });
      return;
    }

    inputEl.current.value = '';

    setForm({
      state: Form.Success,
      message: `Success! You've been added to the list!`
    });
  }
}
Finally, expose the various items created in the hook so that they can be accessible in a component.
return { subscribe, inputEl, form };
The final hook should look like this:
export function useSubscribeToNewsletter() {
  const [form, setForm] = useState<FormState>({ state: Form.Initial });
  const inputEl = useRef(null);

  async function subscribe(e) {
    e.preventDefault();
    setForm({ state: Form.Loading });

    const res = await fetch(`/api/subscribe`, {
      body: JSON.stringify({
        email: inputEl.current.value
      }),
      headers: {
        'Content-Type': 'application/json'
      },
      method: 'POST'
    });

    const { error } = await res.json();

    if (error) {
      setForm({
        state: Form.Error,
        message: error
      });
      return;
    }

    inputEl.current.value = '';
    setForm({
      state: Form.Success,
      message: `Success! You've been added to the list!`
    });
  }

  return { subscribe, inputEl, form };
}
Create a Subscribe Component
Create a new component called Subscribe.js, import the useSubscribeToNewsletter hook and destructure the form, subscribe and inputEl values.
export function Subscribe() {
  const { form, subscribe, inputEl } = useSubscribeToNewsletter();

}
Next, add the appropriate markup to create a signup form. Feel free to tweak the markup below to fit your needs.
export function Subscribe() {
  const { form, subscribe, inputEl } = useSubscribeToNewsletter();

    return (
    <div>
      <p>Updates delivered to your inbox!</p>

      <p>
        A periodic update about my life, recent blog posts, how-tos, and
        discoveries.
      </p>
      <p>No spam - unsubscribe at any time!</p>

      <form onSubmit={subscribe}>
        <input
          ref={inputEl}
          placeholder="bobloblaw@gmail.com"
          type="email"
          autoComplete="email"
          required
        />
        <button type="submit">
          {form.state === Form.Loading ? <span>loading...</span> : 'Subscribe'}
        </button>
      </form>
    </div>
  );
}
Notice the subscribe function attached to the onSubmit event, and the inputEl reference on the input element.
The button provides a call to action unless the form is in the process of submitting, in which case it updates to give visual feedback to the user.
👏 Feel free to add the appropriate logic to display an error or provide visual feedback to the user of a successful submission.
Conclusion
There are three main characters in play for this implementation: the component, the hook, and the Next.js API Route. The component remains simple because the logic is encapsulated in the hook while the Next.js API Route is delegated to contact the Twitter Revue newsletter API and add a subscriber to the list.
Add some styles to your form and try subscribing!
Thanks for reading!
If you found this article helpful, consider signing up for my newsletter below! I often write helpful articles like this one and notify you of new articles each month!